Flutter Full Screen Image
Understanding Full Screen Images
In mobile apps, displaying an image in full screen can provide a more immersive experience for the user. Full screen images are often used in media viewing apps, photo galleries, or when displaying a single image in detail. Flutter provides different widgets and techniques to implement full screen functionality for images.
Creating a New Flutter Project
Before we dive into implementing full screen images, let’s start by creating a new Flutter project. Open your terminal or command prompt and run the following command:
“`
flutter create full_screen_image_app
“`
This will create a new Flutter project named “full_screen_image_app”. Once the project is created, navigate to the project directory using the `cd` command:
“`
cd full_screen_image_app
“`
Setting Up Dependencies for Full Screen Images
To implement full screen images in Flutter, we need to add a few dependencies to our project. Open the `pubspec.yaml` file in the root directory of your project and add the following dependencies:
“`
dependencies:
flutter:
sdk: flutter
photo_view: ^0.10.3
cached_network_image: ^3.0.0
“`
Once you’ve added the dependencies, run the following command to fetch and install them:
“`
flutter pub get
“`
Importing and Displaying an Image
To display an image in Flutter, we can use the `Image` widget. First, let’s import the necessary dependencies in the file `main.dart`:
“`dart
import ‘package:flutter/material.dart’;
import ‘package:photo_view/photo_view.dart’;
import ‘package:cached_network_image/cached_network_image.dart’;
“`
Now, let’s create a simple Flutter app with an image displayed in full screen. Replace the default code in `main.dart` with the following:
“`dart
void main() {
runApp(MyApp());
}
class MyApp extends StatelessWidget {
@override
Widget build(BuildContext context) {
return MaterialApp(
title: ‘Full Screen Image Example’,
theme: ThemeData(
primarySwatch: Colors.blue,
),
home: FullScreenImage(),
);
}
}
class FullScreenImage extends StatelessWidget {
final String imageURL =
‘https://example.com/image.jpg’; // Replace with your own image URL
@override
Widget build(BuildContext context) {
return Scaffold(
appBar: AppBar(
title: Text(‘Full Screen Image’),
),
body: GestureDetector(
onTap: () {
Navigator.push(
context,
MaterialPageRoute(
builder: (context) => DetailScreen(imageURL: imageURL),
),
);
},
child: CachedNetworkImage(
imageUrl: imageURL,
fit: BoxFit.cover,
placeholder: (context, url) => CircularProgressIndicator(),
errorWidget: (context, url, error) => Icon(Icons.error),
),
),
);
}
}
class DetailScreen extends StatelessWidget {
final String imageURL;
const DetailScreen({Key key, this.imageURL}) : super(key: key);
@override
Widget build(BuildContext context) {
return Scaffold(
appBar: AppBar(
title: Text(‘Full Screen Image’),
),
body: Container(
child: PhotoView(
imageProvider: CachedNetworkImageProvider(imageURL),
minScale: PhotoViewComputedScale.contained,
maxScale: PhotoViewComputedScale.covered * 2.0,
backgroundDecoration: BoxDecoration(color: Colors.transparent),
),
),
);
}
}
“`
Adjusting Image Size and Alignment
In the above code, we’re using the `CachedNetworkImage` widget from the `cached_network_image` package to load and display the image. We set the `imageUrl` property to the URL of the image we want to display. You can replace it with your own image URL.
To adjust the size of the image, you can use the `fit` property of the `CachedNetworkImage` widget. In our example, we set it to `BoxFit.cover` to make the image cover the entire screen. You can experiment with different fit options to achieve your desired result.
Implementing Full Screen Functionality
To enable full screen functionality, we wrapped the `CachedNetworkImage` widget with a `GestureDetector` widget. When the user taps on the image, we navigate to a new screen called `DetailScreen` using the `Navigator.push` method. The image URL is passed to the `DetailScreen` through its constructor.
Adding Gestures to the Image
In the `DetailScreen` widget, we’re using the `PhotoView` widget from the `photo_view` package to display the image in full screen. It provides built-in gesture support for zooming and panning the image. You can customize the min and max scale values to control the zoom level. In our example, we set the min scale to `PhotoViewComputedScale.contained` and the max scale to `PhotoViewComputedScale.covered * 2.0`.
Improving Performance and Optimizing Image Loading
To improve performance and optimize image loading, especially for large images, we’re using the `CachedNetworkImage` widget. It caches the loaded image locally, reducing the need to fetch and download the image every time it is displayed. The placeholder and error widgets provide feedback to the user while the image is being loaded or if an error occurs.
FAQs
1. How can I display a full screen image in Flutter?
To display a full screen image in Flutter, you can use the `Image` widget and wrap it with a `GestureDetector` to implement full screen functionality. Another option is to use the `PhotoView` widget from the `photo_view` package, which provides built-in support for zooming and panning the image.
2. How can I adjust the size and alignment of the image?
You can adjust the size of the image by using the `fit` property of the `Image` widget. Some common fit options include `BoxFit.cover` to cover the entire screen, `BoxFit.contain` to fit the image within the screen, and `BoxFit.fill` to stretch the image to fill the screen. To align the image within its container, you can use the `alignment` property.
3. How can I add gestures to the image?
To add gestures to the image, you can wrap the `Image` widget with a `GestureDetector` and handle the appropriate gesture events. For example, you can use the `onTap` event to implement full screen functionality when the user taps on the image.
4. How can I improve performance and optimize image loading?
For improved performance and optimized image loading, you can use the `CachedNetworkImage` widget from the `cached_network_image` package. It caches the loaded image locally, reducing the need to fetch and download the image every time it is displayed. Additionally, you can provide placeholder and error widgets to provide feedback to the user while the image is being loaded or if an error occurs.
In conclusion, Flutter provides various widgets and techniques to implement full screen images in mobile apps. By using the `Image` widget, `GestureDetector`, and packages like `cached_network_image` and `photo_view`, developers can create immersive and visually appealing experiences for their users.
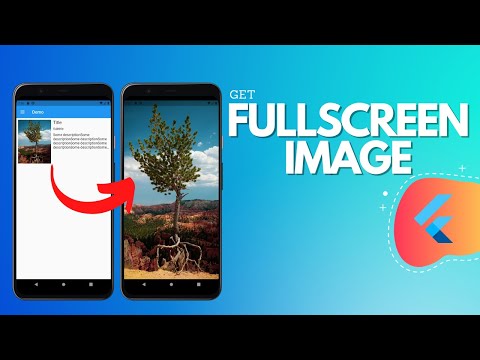
Get Full Screen Image In Flutter | Exploring Packages | Flutter Tutorials
Keywords searched by users: flutter full screen image Image full screen flutter, Full screen Flutter, Container full screen flutter, Flutter image, Video player full screen flutter, Background image flutter, Flutter dialog full screen, Set size image flutter
Categories: Top 47 Flutter Full Screen Image
See more here: nhanvietluanvan.com
Image Full Screen Flutter
Flutter, Google’s open-source UI software development kit, has gained immense popularity among developers for creating beautiful and performant mobile applications. One key aspect of mobile app development is the ability to display stunning images that captivate users’ attention. And when it comes to showcasing images in a full-screen mode, Flutter makes it incredibly easy and efficient. In this article, we will delve into the concept of image full screen in Flutter, exploring its implementation and highlighting its benefits.
Introduction to Flutter’s Image Widget
Flutter provides a built-in widget called “Image” that allows developers to display both local and network images effortlessly. This widget efficiently handles image loading, caching, and resizing. The “Image” widget relies on the underlying “dart:ui” library to render images, ensuring excellent performance across different devices.
Creating a Full-Screen Image in Flutter
To create a full-screen image in Flutter, we need to wrap the “Image” widget inside a “Container” widget. The “Container” widget provides numerous properties to customize the appearance and behavior of the image. Here’s an example:
“`dart
Container(
color: Colors.black, // Background color
constraints: BoxConstraints.expand(), // Ensures the image fills the entire space
child: Image.network(
‘https://example.com/image.jpg’, // URL of the image
fit: BoxFit.cover, // Determines how the image fills the available space
),
)
“`
In this example, we set the background color of the “Container” to black, creating a visually immersive full-screen experience. The “BoxConstraints.expand()” property ensures the image takes up the entire available space, making it appear as a full-screen image. The “fit” property of the “Image” widget determines how the image fills the available space. In this case, we use `BoxFit.cover`, which scales and crops the image to fill the entire space without distorting or leaving any blank areas.
Benefits of Using Image Full Screen in Flutter
1. Enhanced User Experience: Displaying images in a full-screen mode can greatly enhance the user experience as it allows users to focus solely on the visual content without any distractions.
2. Visual Impact: Full-screen images have a higher visual impact and can help convey emotions, messages, or product showcases more effectively, leading to increased engagement and conversions.
3. Consistent Design: Flutter’s image full-screen implementation ensures a consistent design across different devices and screen sizes, making the app look polished and professional.
4. Easy Navigation: In some cases, full-screen images can be utilized as a background for other UI elements, providing an intuitive and easy-to-use navigation experience for users.
Now, let’s address a few FAQs related to image full screen in Flutter:
FAQs
Q1. Can I use local images to create a full-screen image in Flutter?
Yes, Flutter allows you to use both local and network images to create a full-screen image. The “Image” widget supports loading images from the local asset bundle or from the device’s storage.
Q2. How can I handle the aspect ratio of the full-screen image?
Flutter’s “Image” widget provides several options to handle the aspect ratio of the image. You can use properties like `fit`, `alignment`, and `repeat` to adjust the appearance and behavior of the image within the full-screen container.
Q3. Can I add overlays or other UI elements on top of the full-screen image?
Certainly! Flutter provides several techniques to overlay UI elements on top of images. You can use additional widgets like “Stack” or “Positioned” to position and layer the UI elements on top of the full-screen image.
Q4. How can I handle image loading and performance considerations?
Flutter’s “Image” widget efficiently handles image loading, caching, and resizing, ensuring optimal performance. Additionally, Flutter offers various packages like “cached_network_image” that further enhance image loading performance by caching images and providing placeholder options during loading.
Conclusion
In this article, we explored the concept of image full screen in Flutter and learned how to create captivating full-screen images using the “Image” widget. We also discussed the benefits of using full-screen images and addressed some commonly asked questions. By leveraging Flutter’s powerful UI capabilities, developers can create stunning full-screen image experiences that enhance user engagement and elevate the overall app design. So, whether you’re building a portfolio, e-commerce, or media app, consider utilizing full-screen images in Flutter to leave a lasting impression on your users. Happy coding!
Full Screen Flutter
Flutter, the open-source UI software development framework, has gained immense popularity for its ability to build beautiful and highly functional applications across multiple platforms. One of the key features that contribute to its success is the ability to create full-screen experiences for users, providing them with a truly immersive and engaging environment. In this article, we will explore the concept of full-screen Flutter, its advantages, and how you can utilize it to enhance user experience.
What is Full Screen Flutter?
Full screen Flutter refers to the ability of Flutter apps to occupy the entire screen space, eliminating distractions and maximizing the visual impact on users. This means that apps created using Flutter can effectively utilize the entire display area, from edge to edge, providing users with a seamless, uninterrupted experience.
Advantages of Full Screen Flutter:
1. Immersive User Experience: The most noticeable advantage of full screen Flutter is the immersive experience it offers to users. By eliminating distractions such as status bars, notifications, or navigation menus, developers can ensure users remain fully engaged with the content or task at hand.
2. Enhanced Visual Impact: With the entire screen space at their disposal, developers can leverage high-resolution graphics and animations to captivate users. Whether it’s showcasing stunning images or delivering smooth transitions, the use of full screen Flutter can significantly enhance the visual impact of your app.
3. Seamless Navigation: Full screen Flutter allows for creative design choices when it comes to navigation patterns. By adopting fluid gestures, hidden menus, or transparent overlays, developers can create intuitive and seamless navigation experiences that elevate the user journey.
4. Consistent User Interface: Flutter’s widget-based architecture enables developers to maintain a consistent user interface across multiple platforms, including iOS and Android. This means that even when utilizing full screen mode, your app’s UI elements will behave consistently, providing a familiar and intuitive experience for users, regardless of the device they are using.
Implementing Full Screen Flutter:
Implementing full screen mode in your Flutter app is relatively straightforward. By leveraging the Flutter framework’s APIs, you can easily modify your app’s layout to occupy the entire screen estate. The following are some key steps to consider:
1. Remove System Bars: Flutter provides the SystemChrome class, which allows you to control the visibility of system bars (status bar, navigation bar) in your app. By setting the flags to hide these bars, you can create a full screen experience.
2. Adjust Layout Constraints: To utilize the entire available space effectively, you may need to modify your app’s layout constraints. Flutter provides various widgets and MediaQuery class to help you adjust your UI elements accordingly.
3. Handle Device Orientation: When implementing full screen Flutter, it is essential to consider the device orientation. Flutter offers OrientationBuilder, which provides callbacks whenever the orientation switches, allowing you to adapt your UI components dynamically.
Frequently Asked Questions (FAQs):
Q1. Do I need to create separate layouts for iOS and Android to achieve full screen Flutter?
A1. No, Flutter’s widget-based architecture ensures that your UI elements adapt seamlessly across platforms. You don’t need to create separate layouts for full screen mode on different platforms.
Q2. Will full screen Flutter impact performance?
A2. Full screen Flutter itself does not impact performance significantly. However, it is crucial to consider the complexity of your UI elements and the underlying animations, as they can affect performance when running in full screen mode.
Q3. Can I still provide necessary navigation elements in full screen Flutter?
A3. Absolutely. While full screen mode eliminates system bars, you can create hidden or transparent navigation elements to ensure users can navigate through your app effectively.
Q4. Is full screen Flutter suitable for all types of apps?
A4. Full screen Flutter can be beneficial for various app types, including media delivery, gaming, or immersive reading experiences. However, it may not be suitable for apps heavily reliant on system-provided notifications or persistent system overlays.
Conclusion:
Full screen Flutter offers a range of advantages in terms of user experience and visual impact. With Flutter’s flexibility and powerful APIs, developers can easily create immersive and engaging experiences that captivate users. By effectively utilizing the entire screen space, you can elevate your app to another level, ensuring your users remain engaged and impressed.
Container Full Screen Flutter
Introduction:
In the world of Flutter, a popular cross-platform framework for app development, developers often strive to create immersive and visually appealing user interfaces. One key aspect of achieving this objective is utilizing the Container widget to create a full-screen experience. In this article, we will delve into the concept of Container full screen Flutter, exploring its significance, usage, and implementation. So, let’s dive right in!
What is Container Full Screen in Flutter?
In Flutter, the Container is a versatile widget that allows developers to customize and control the layout, appearance, and dimensions of other widgets. When we refer to “Container full screen,” we are essentially describing a Container that expands to fill the entire space available on the device screen.
Importance of Container Full Screen in Flutter:
Container full screen serves as a crucial element in app development, offering several advantages. Firstly, it allows developers to optimize the utilization of the screen real estate, ensuring that their apps are visually appealing on different devices and screen sizes. This flexibility ensures that the app adapts to a variety of smartphones, tablets, and even larger screens, enhancing the user experience.
By utilizing Container full screen, developers can deliver a consistent and immersive experience across different devices, making the app feel more polished and professional. Moreover, it provides a seamless transition between screens, eliminating any jarring visual elements, and maintaining the flow of the user experience.
Usage and Implementation:
Implementing Container full screen in Flutter is relatively straightforward. Developers can follow these steps to achieve a full-screen layout using the Container widget:
Step 1: Import the required Flutter libraries:
“`
import ‘package:flutter/material.dart’;
“`
Step 2: Create a new StatefulWidget class:
“`
class FullScreenContainer extends StatefulWidget {
@override
_FullScreenContainerState createState() => _FullScreenContainerState();
}
“`
Step 3: Define the State class and override the build() method:
“`
class _FullScreenContainerState extends State
@override
Widget build(BuildContext context) {
return Scaffold(
body: Container(
constraints: BoxConstraints.expand(),
// Add child widgets as needed
),
);
}
}
“`
Step 4: Run the app and display the full-screen Container:
“`
void main() {
runApp(MaterialApp(
home: FullScreenContainer(),
));
}
“`
By implementing the above steps, developers can create a full-screen layout using the Container widget to encapsulate other widgets as needed.
FAQs:
Q1. Can I add content to a full-screen Container in Flutter?
A1. Yes, you can add child widgets to a full-screen Container. The Container widget provides properties like child, which allows you to nest other widgets within it.
Q2. How can I add padding or margin to a full-screen Container?
A2. To add padding or margin to a Container, you can use properties like padding and margin while defining the Container. For example, setting EdgeInsets.all(16.0) will add a padding of 16 pixels to all sides of the Container.
Q3. Can I animate a full-screen Container in Flutter?
A3. Yes, Flutter provides a wide range of animation options. You can apply animations to the Container or its child widgets using animation libraries like Flutter’s built-in AnimationController or external packages like Rive or Flare.
Q4. Can I make a full-screen Container responsive in Flutter?
A4. Yes, you can make a full-screen Container responsive by utilizing Flutter’s flexible and responsive layout widgets. You can use MediaQuery to retrieve the screen size and adjust the Container properties accordingly.
Conclusion:
Container full screen Flutter is an invaluable tool for developers seeking to create immersive and visually appealing user interfaces. By leveraging the flexibility and customization options offered by the Container widget, developers can create full-screen layouts that adapt seamlessly to different devices and screen sizes. This article has presented the importance, usage, and implementation of Container full screen in Flutter, providing developers with the knowledge and tools to create stunning user interfaces. So, go ahead and explore the world of Container full screen Flutter, and create remarkable apps that captivate your users!
Images related to the topic flutter full screen image
Found 35 images related to flutter full screen image theme













_how-to-make-app-bar-transparent-in-flutter-preview-hqdefault.jpg)





_flutter-tutorial-expandable-list-expansiontile-amp-listtile.jpg)

Article link: flutter full screen image.
Learn more about the topic flutter full screen image.
- How to show fullscreen image in flutter – dart – Stack Overflow
- full_screen_image | Flutter Package – Pub.dev
- Make fullscreen image in Flutter – Medium
- Easy way to make full screen image in Flutter
- Flutter: Set an image Background for the entire screen
- Gallery Image Fullscreen Zoomable in Flutter – Morioh
- [Solved]-How to show fullscreen image in flutter-Flutter
- Flutter Full screen photo viewer and dismiss when drag down
- 3 Ways To Display Image In Flutter – AppMaking.co
See more: nhanvietluanvan.com/luat-hoc