Jq: Command Not Found
The “jq: command not found” error is a common issue that users encounter when trying to use the jq command-line tool for JSON processing. This error message suggests that the system cannot find the jq executable in its PATH variable. In this article, we will discuss how to check if jq is installed on different operating systems and provide solutions to resolve the “jq: command not found” error.
Checking if jq is installed
Before diving into the possible solutions, it is essential to determine whether jq is already installed on your system. Here’s how you can check for jq installation on different operating systems.
1. Checking if jq is installed on Linux:
To check if jq is installed on Linux, open a terminal window and type the following command:
“`
jq –version
“`
If jq is installed, it will display the version information; otherwise, it will return a “jq: command not found” error.
2. Checking if jq is installed on macOS:
Similarly, on macOS, open a terminal and run the following command:
“`
jq –version
“`
If jq is installed, you will see the version information; otherwise, the error message “jq: command not found” will be displayed.
3. Checking if jq is installed on Windows:
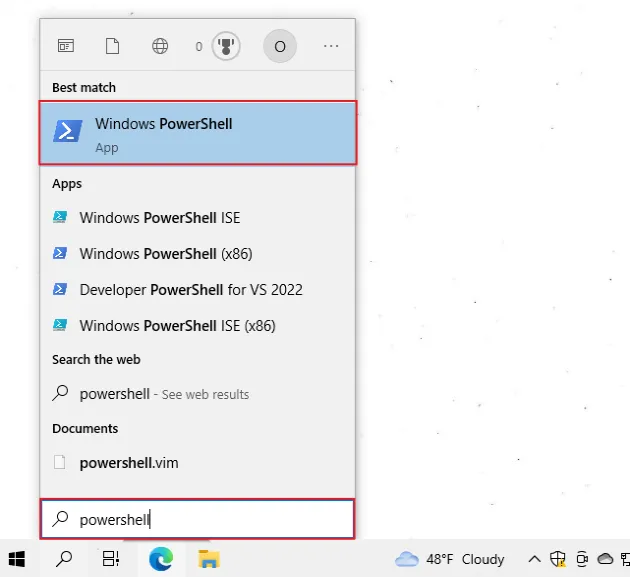
On Windows, open the command prompt or PowerShell and enter the following command:
“`
jq –version
“`
If jq is installed, it will show the version information; otherwise, you will receive the “jq: command not found” error.
Installing jq if not present
If jq is not installed on your system, you need to install it before you can use it. Here’s how you can install jq on different operating systems.
4. Installing jq on Linux:
To install jq on Linux, you can use your distribution’s package manager. Here are the commands for some popular Linux distributions:
– CentOS, RHEL, Fedora:
“`
sudo yum install jq
“`
– Ubuntu, Debian:
“`
sudo apt-get install jq
“`
– Arch Linux:
“`
sudo pacman -S jq
“`
5. Installing jq on macOS:
On macOS, you can use Homebrew, a popular package manager, to install jq. Open a terminal and run the following command:
“`
brew install jq
“`
If Homebrew is not installed, you can install it by following the instructions on the Homebrew website (https://brew.sh/).
6. Installing jq on Windows:
To install jq on Windows, you can use the Chocolatey package manager. Open the command prompt or PowerShell as an administrator and enter the following command:
“`
choco install jq
“`
If you don’t have Chocolatey installed, you can find the installation instructions on the Chocolatey website (https://chocolatey.org/).
Updating the system’s PATH variable
If you have installed jq but still encounter the “jq: command not found” error, it could be because the system’s PATH variable does not include the directory where the jq executable is located. Here’s how you can update the PATH variable on different operating systems.
7. Adding jq to the PATH on Linux:
On Linux, you can add the directory containing the jq executable to the system’s PATH variable by modifying the ~/.bashrc or ~/.bash_profile file. Open the file using a text editor and add the following line at the end:
“`
export PATH=”$PATH:/path/to/jq”
“`
Replace “/path/to/jq” with the actual path where jq is installed.
8. Adding jq to the PATH on macOS:
On macOS, you can update the system’s PATH variable by modifying the ~/.bash_profile or ~/.zshrc file. Open the file using a text editor and add the following line at the end:
“`
export PATH=”$PATH:/path/to/jq”
“`
Replace “/path/to/jq” with the actual path where jq is installed.
9. Adding jq to the PATH on Windows:
On Windows, you need to add the directory containing the jq executable to the system’s PATH variable using the Environment Variables settings. Here’s how:
– Open the Control Panel and search for “Environment Variables.”
– Click on “Edit the system environment variables.”
– In the System Properties window, click on the “Environment Variables” button.
– In the “System Variables” section, select the “Path” variable and click on “Edit.”
– Click on “New” and enter the path to the directory where jq is installed.
– Click “OK” to save the changes.
Once you have updated the PATH variable, close and reopen your terminal or command prompt for the changes to take effect.
FAQs – Frequently Asked Questions
Q1. I installed jq, but it still shows “jq: command not found.” What should I do?
A1. This error usually occurs when the jq executable is not in the system’s PATH variable. Ensure that you have added the correct path to the directory where jq is installed to the PATH variable.
Q2. Can I use a different JSON processing tool instead of jq?
A2. Yes, there are alternative JSON processing tools available, such as JqLite, Jello, and JSON.sh. However, jq is widely used and offers extensive functionality for JSON processing.
Q3. How can I uninstall jq from my system?
A3. To uninstall jq, you can use the package manager or the uninstallation method you used to install it. For example, on Linux, you can run the appropriate package manager command with the “remove” option, such as “sudo yum remove jq” or “sudo apt-get remove jq.”
Q4. I’m still having trouble with the “jq: command not found” error. What should I do?
A4. If none of the solutions mentioned above work, ensure that the installation was successful and try restarting your system. If the problem persists, seek assistance from the official jq support channels or the community forums.
In conclusion, the “jq: command not found” error can be resolved by checking if jq is installed, installing it if necessary, and updating the system’s PATH variable. By following the steps outlined in this article, you should be able to resolve the error and use jq for JSON processing efficiently.
How To Install Jq Command-Line Json Processor On Windows.
How To Install Jq Command?
The jq command is a lightweight and flexible command-line JSON processor. It provides a simple and effective way to manipulate, query, and transform JSON data, making it a powerful tool for developers, data scientists, and system administrators. In this article, we will guide you through the process of installing jq on different platforms, including Linux, macOS, and Windows, and provide answers to some commonly asked questions.
Table of Contents:
1. Installing jq on Linux
2. Installing jq on macOS
3. Installing jq on Windows
4. Frequently Asked Questions (FAQs)
Installing jq on Linux:
1. Open the terminal.
2. Update the package manager:
“`
sudo apt update
“`
3. Install jq using the package manager:
“`
sudo apt install jq
“`
4. Verify the installation:
“`
jq –version
“`
Installing jq on macOS:
1. Open the terminal.
2. Install Homebrew package manager:
“`
/bin/bash -c “$(curl -fsSL https://raw.githubusercontent.com/Homebrew/install/master/install.sh)”
“`
3. Install jq using Homebrew:
“`
brew install jq
“`
4. Verify the installation:
“`
jq –version
“`
Installing jq on Windows:
1. Download the latest binary release of jq from the official website (https://stedolan.github.io/jq/download/).
2. Extract the downloaded archive.
3. Add the path to the extracted folder to the system’s PATH environment variable:
– Open the Start menu, right-click on “Computer” or “This PC”, and select “Properties”.
– Click on “Advanced system settings” on the left-hand side.
– In the System Properties window, click on the “Environment Variables” button.
– In the “System variables” section, select the “Path” variable and click on “Edit”.
– Add the path to the extracted folder (e.g., `C:\jq`) at the end of the “Variable value” field, separated by a semicolon.
– Click “OK” on all windows.
4. Open a new instance of the command prompt or PowerShell.
5. Verify the installation:
“`
jq –version
“`
Frequently Asked Questions (FAQs):
Q1: What is jq command used for?
A1: The jq command is used for processing and manipulating JSON data from the command line. It allows you to extract specific data, filter and transform JSON structures, and perform various operations on JSON documents.
Q2: Can I install jq using a package manager on Windows?
A2: While package managers like apt and Homebrew are commonly used on Linux and macOS, Windows does not have a built-in package manager. Hence, you need to download the jq binary directly from the official website and add it to the system’s PATH environment variable.
Q3: Are there any alternatives to jq?
A3: Yes, there are alternatives to jq, such as JQPlay (an online version of jq), json.tool (a module in Python’s standard library), and several programming languages (e.g., Python, JavaScript, and Ruby) have their own JSON parsing and manipulation libraries.
Q4: Can I install jq using a package manager other than apt or Homebrew?
A4: Yes, other package managers like yum, pacman, and zypper are available for different Linux distributions. Ensure you’re using the appropriate command for your specific package manager and distribution.
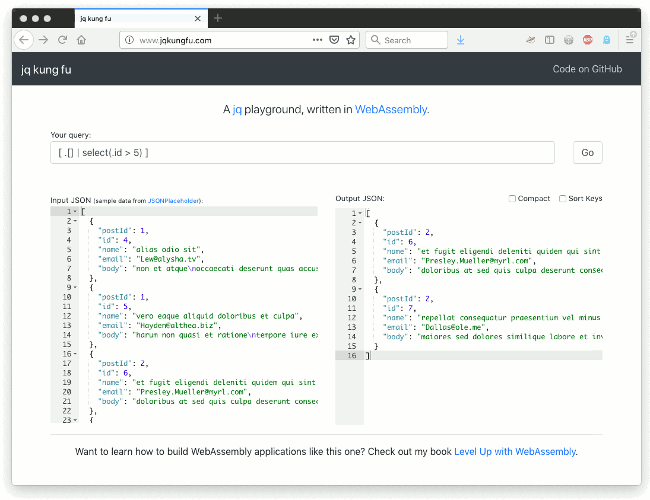
Q5: How can I learn more about jq’s capabilities and syntax?
A5: The official jq documentation (https://stedolan.github.io/jq/manual/) is a great resource to learn more about the command’s capabilities, options, and syntax. It provides comprehensive examples and explanations to help you master jq.
In conclusion, installing the jq command is a fairly straightforward process on different platforms. Whether you’re using Linux, macOS, or Windows, following the provided instructions will allow you to easily install jq and take advantage of its powerful JSON processing capabilities. Remember to consult the official documentation and explore the vast array of possibilities jq offers to efficiently work with JSON data.
How To Install Jq Command In Linux?
jq is a powerful command-line JSON processor that allows you to extract, manipulate, and transform structured data directly from the command line. It is immensely useful for handling JSON files and APIs in Linux systems. In this article, we will guide you through the process of installing jq command on Linux, along with some frequently asked questions.
Installing jq on Linux:
Follow the step-by-step instructions below to install jq command on various popular Linux distributions.
1. Ubuntu/Debian:
– Open the Terminal.
– Update your package lists by entering the command:
“`
sudo apt-get update
“`
– Install jq by typing:
“`
sudo apt-get install jq
“`
2. CentOS/Fedora:
– Launch the Terminal.
– Update the package lists using the following command:
“`
sudo dnf update
“`
– Install jq by typing:
“`
sudo dnf install jq
“`
3. Arch Linux:
– Open the Terminal.
– Update package lists by entering the command:
“`
sudo pacman -Syu
“`
– Install jq with the command:
“`
sudo pacman -S jq
“`
4. Mac OS X (Homebrew):
– Launch the Terminal.
– Install Homebrew if you haven’t already by executing:
“`
/bin/bash -c “$(curl -fsSL https://raw.githubusercontent.com/Homebrew/install/HEAD/install.sh)”
“`
– Install jq using Homebrew by typing:
“`
brew install jq
“`
5. Windows (WSL – Windows Subsystem for Linux):
– Open your preferred Linux distribution within Windows Subsystem for Linux.
– Follow the instructions mentioned above for the respective Linux distribution.
Once the installation process is complete, you can verify whether jq is successfully installed on your system by opening the Terminal and typing `jq –version`. If the installation went smoothly, you should see the version information printed on the screen.
Frequently Asked Questions:
Q1. How can I use jq command to format JSON data?
A1. To format JSON data using jq, you can pipe the JSON data from a file or command to jq, like this:
“`
jq ‘.’ file.json
“`
This will pretty-print the JSON data on your terminal.
Q2. Can I use jq to filter and extract specific data from a JSON file?
A2. Absolutely! jq offers powerful filtering capabilities. For instance, to extract the value of a specific key from a JSON file, you can use the following command:
“`
jq ‘.keyName’ file.json
“`
Replace `keyName` with the actual key you wish to extract.
Q3. Is it possible to modify JSON data using jq?
A3. Yes, jq provides various functions to transform and modify JSON data. You can use the assignment operator (`=`) to modify values in a JSON file. For example:
“`
jq ‘.keyName = “New Value”‘ file.json
“`
This command will update the value of `keyName` to “New Value” in the JSON file.
Q4. How can I iterate over an array in a JSON file using jq?
A4. To iterate over an array in JSON using jq, you can use the `.[]` syntax. For example, to extract all values of an array named `myArray`, use the following command:
“`
jq ‘.myArray[]’ file.json
“`
Q5. Can I use jq to pretty-print JSON data in a file and save it?
A5. Absolutely! You can use the following command to pretty-print JSON data and save it to a file:
“`
jq ‘.’ file.json > output.json
“`
This command will format the JSON data from `file.json` and save the formatted output to `output.json`.
In conclusion, installing jq command on Linux is a straightforward process that varies slightly depending on the Linux distribution being used. Once installed, jq provides powerful and versatile capabilities for working with JSON data. Whether you need to filter, extract, modify, or format JSON, jq has got you covered. With the FAQs section addressing common queries, you now have a comprehensive guide to get started with jq and leverage its capabilities in your Linux environment.
Keywords searched by users: jq: command not found Install jq, Install jq CentOS 7, Install jq Ubuntu, Install jq Windows, Install jq macOS, Amazon linux install jq, Gitlab ci install jq, Unable to locate package jq
Categories: Top 79 Jq: Command Not Found
See more here: nhanvietluanvan.com
Install Jq
(jq is a lightweight and flexible command-line JSON processor that allows users to manipulate, filter, and transform JSON data easily. It is a powerful tool for working with JSON files and APIs, providing developers with the ability to extract relevant information quickly and efficiently. In this article, we will guide you through the process of installing jq on your machine.)
Installing jq on Linux
1. Package Manager
The easiest way to install jq on most Linux distributions is to use the package manager. Open your terminal and enter the following command based on your distribution:
– Ubuntu/Debian: sudo apt-get install jq
– Fedora: sudo dnf install jq
– CentOS/RHEL: sudo yum install epel-release && sudo yum install jq
2. Build from Source
If you prefer to build jq from source, follow these steps:
1. Download the latest release of jq from the official GitHub repository (https://github.com/stedolan/jq/releases).
2. Extract the downloaded package using the tar command: tar -xvf jq-
3. Navigate into the extracted directory: cd jq-
4. Run the following commands one by one to build and install jq on your system:
– ./configure –disable-maintainer-mode
– make
– sudo make install
Installing jq on macOS
1. Homebrew
If you have Homebrew installed, you can simply run the following command in your terminal to install jq:
brew install jq
2. Manual Installation
If you don’t have Homebrew, you can manually install jq following these steps:
1. Open your terminal and run the following command to clone jq’s GitHub repository:
– git clone https://github.com/stedolan/jq.git
2. Navigate into the cloned directory: cd jq
3. Build and install jq by running these commands:
– autoreconf -i
– ./configure –disable-maintainer-mode
– make
– sudo make install
Installing jq on Windows
1. Download Precompiled Binaries
To install jq on Windows, you can download the precompiled binaries from the official GitHub repository (https://github.com/stedolan/jq/releases).
2. Extract and Add to System Path
– Download the zip file matching your system architecture (32-bit or 64-bit).
– Extract the contents of the zip file to a directory of your choice.
– Open the Start menu, search for “environment variables,” and choose “Edit the system environment variables.”
– In the System Properties window, click on the “Environment Variables” button.
– Under “System variables,” locate the “Path” variable and click on “Edit.”
– Click “New” and add the path to the directory containing the extracted jq binaries.
– Click “OK” to save the changes.
FAQs
Q: What is jq used for?
A: jq is primarily used for working with JSON data. It allows users to manipulate, filter, and transform JSON files and APIs easily. It is commonly used in scripting, parsing API responses, and extracting specific fields from complex JSON structures.
Q: Can jq handle large JSON files efficiently?
A: Yes, jq is designed to handle large JSON files efficiently. It uses a streaming processor, which means it performs operations on JSON data as they are read, rather than loading the entire file into memory. This makes it suitable for processing large datasets without consuming excessive system resources.
Q: Can I use jq to convert JSON to other formats?
A: Yes, jq provides an option to convert JSON data to various formats such as CSV, TSV, XML, and even plain text. It offers flexible output formatting options, enabling you to customize the output according to your needs.
Q: Does jq support JSON schema validation?
A: No, jq does not provide built-in support for JSON schema validation. However, there are other tools available, such as “ajv” or “jsonschema,” that can be used in conjunction with jq to validate JSON data against a schema.
Q: Can I use jq with APIs?
A: Yes, jq is commonly used for parsing and filtering responses from APIs. It allows you to extract specific fields or perform operations on API responses easily. You can use jq in combination with tools like cURL to query APIs and process the JSON data returned.
In conclusion, jq is a versatile command-line JSON processor that simplifies working with JSON data. By installing jq on your machine, you gain the ability to manipulate, filter, transform, and extract information from JSON files and APIs effortlessly. Whether you are a developer, data analyst, or just dealing with JSON data regularly, jq proves to be an invaluable tool in your arsenal.
Install Jq Centos 7
Have you ever found yourself in a situation where you needed to extract specific data from a JSON file in your CentOS 7 environment? If so, then you’ll be glad to know that jq is a powerful command-line tool that enables you to manipulate and analyze JSON data effortlessly. In this article, we will guide you through the step-by-step process of installing jq on CentOS 7, as well as provide answers to some frequently asked questions.
Installing jq on CentOS 7 is a straightforward process and can be done by following the steps outlined below:
Step 1: Connecting to a CentOS 7 server
First, ensure that you are connected to a CentOS 7 server either through the terminal or via SSH. This will allow you to execute the necessary commands to install jq.
Step 2: Updating the system
Before proceeding with the installation, it is recommended to update your CentOS 7 system to ensure that you have the latest packages and fixes. To do this, run the following command:
sudo yum update
This command will update all the installed packages on your system. Depending on your internet connection speed and the number of packages that need to be updated, this process may take a few minutes.
Step 3: Installing EPEL repository
jq is not available in the default CentOS 7 repositories. Therefore, you will need to install the EPEL (Extra Packages for Enterprise Linux) repository to access jq. To install it, use the following command:
sudo yum install epel-release
You will be prompted to confirm the installation by typing ‘y’ and pressing Enter.
Step 4: Installing jq
Now that the EPEL repository is installed, you can proceed with the installation of jq. Execute the following command:
sudo yum install jq
Again, you will be prompted to confirm the installation. Simply type ‘y’ and press Enter.
Step 5: Verifying the installation
After installation, it is prudent to verify that jq has been installed successfully. This can easily be done by running the following command:
jq –version
If jq is installed correctly, you will see the version number displayed in the output.
Congratulations! You have successfully installed jq on CentOS 7. You can now start leveraging its powerful capabilities to process and manipulate JSON data.
FAQs:
Q1: What is jq and why is it useful?
A1: jq is a lightweight and versatile command-line tool for processing and analyzing JSON data. It can be immensely beneficial when dealing with APIs and working with JSON files. jq enables you to extract, filter, and transform JSON data effortlessly, making it easier to work with complex datasets.
Q2: Can I use jq on platforms other than CentOS 7?
A2: Yes, absolutely! jq is a cross-platform tool and can be installed and used on various operating systems, including Linux distributions, macOS, and Windows.
Q3: How do I use jq to filter JSON data?
A3: jq provides a wide range of filters that allow you to extract specific fields or filter data based on conditions. For example, to extract the value of a specific field from a JSON file, you can use the following command: jq ‘.field_name’ file.json
Q4: Are there any additional resources or tutorials to learn more about jq?
A4: Yes, the official jq documentation is an excellent resource to explore the tool’s features and learn how to leverage its power. You can find it at https://stedolan.github.io/jq/.
Q5: Can jq be used with programming languages like Python or PHP?
A5: Absolutely! jq comes with a powerful command-line interface, but it can also be used as a library within your code. There are jq bindings available for popular programming languages like Python and PHP, allowing you to integrate it seamlessly into your data processing pipelines.
In conclusion, installing jq on your CentOS 7 environment opens up a world of possibilities for manipulating and analyzing JSON data. By following the step-by-step installation guide outlined in this article, you can easily get jq up and running, unleashing its powerful features for your JSON processing needs.
Images related to the topic jq: command not found

Found 32 images related to jq: command not found theme



![How to install jq on Ubuntu? [100% Working] | GoLinuxCloud How To Install Jq On Ubuntu? [100% Working] | Golinuxcloud](https://www.golinuxcloud.com/wp-content/uploads/jq-ubuntu-1-e1669635875679.jpg)

![How to install jq on Ubuntu? [100% Working] | GoLinuxCloud How To Install Jq On Ubuntu? [100% Working] | Golinuxcloud](https://www.golinuxcloud.com/wp-content/uploads/jq-ubuntu-2-e1669635908196.jpg)









Article link: jq: command not found.
Learn more about the topic jq: command not found.
- How to Fix “jq: Command Not Found (JSON CLI Parser)” Error?
- How to fix ‘jq: command not found’ – Programmer Hat
- Solved: bash: jq:command not found – Atlassian Community
- How to install JQ on Mac on the command line? – Stack Overflow
- How to install and use ‘jq’ on Windows | bobbyhadz
- Download jq – GitHub Pages
- Install jq JSON processor on Ubuntu 10.04 – Stack Overflow
- Git Bash: Install jq – ShellHacks
- jq: command not found (JSON CLI Parser) – The Geek Diary
- jq – command-not-found.com
- How to install and use ‘jq’ on Windows | bobbyhadz
- How to Install jq, a Command Line JSON Parser, on Mac
- How to install jq on Ubuntu? [100% Working] – GoLinuxCloud
See more: https://nhanvietluanvan.com/luat-hoc/